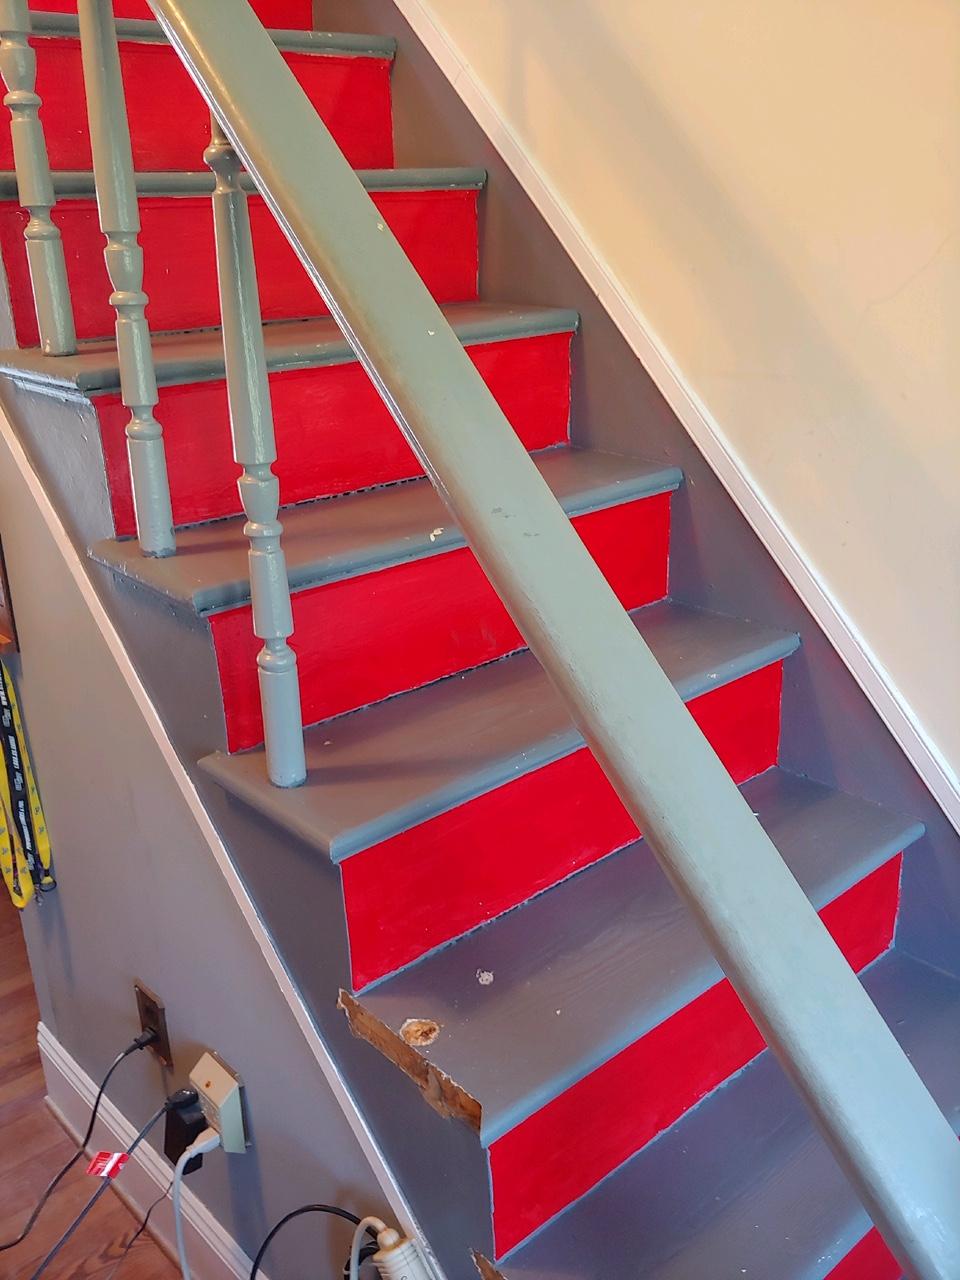
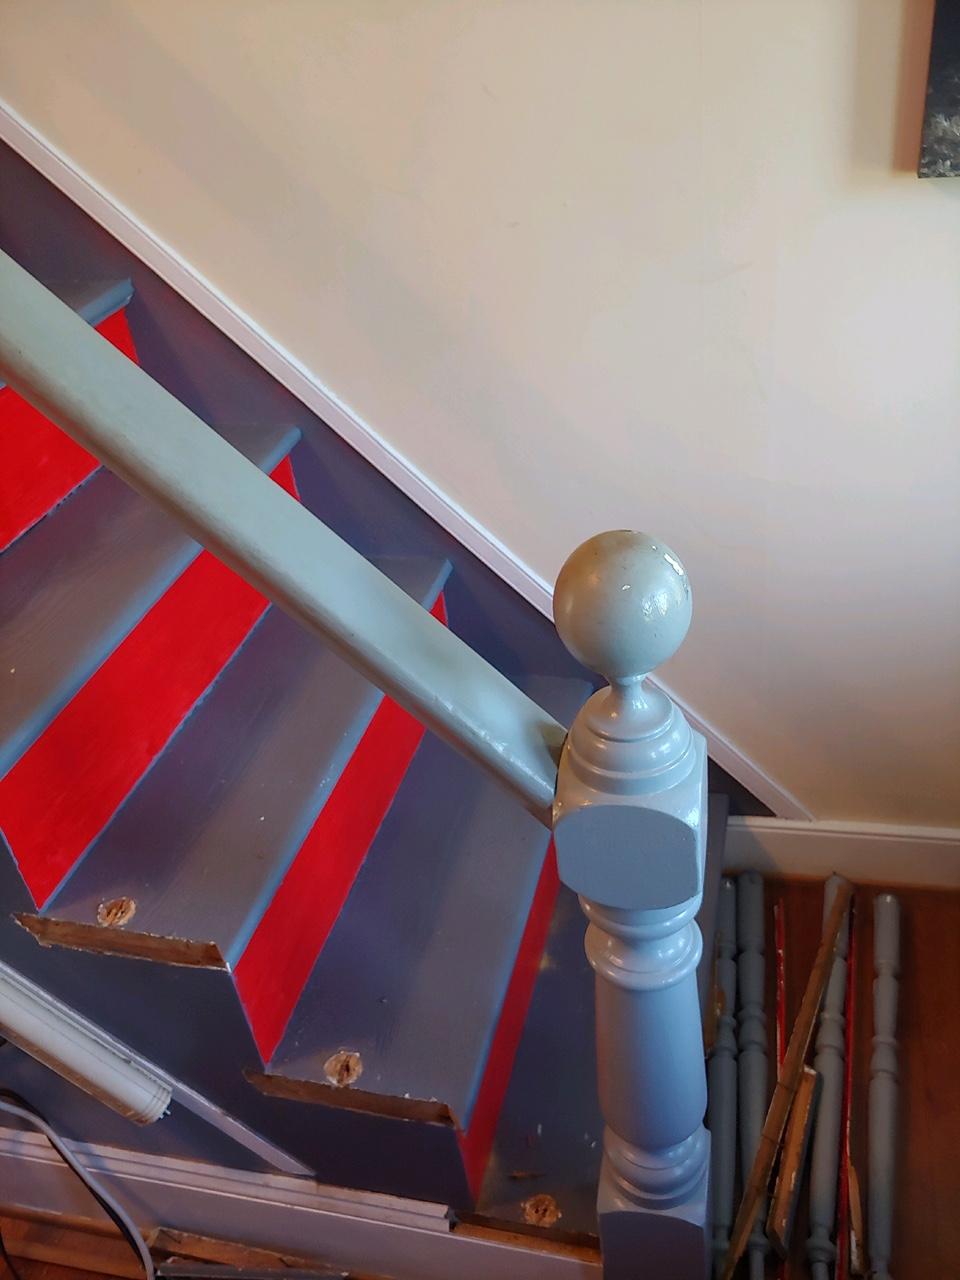
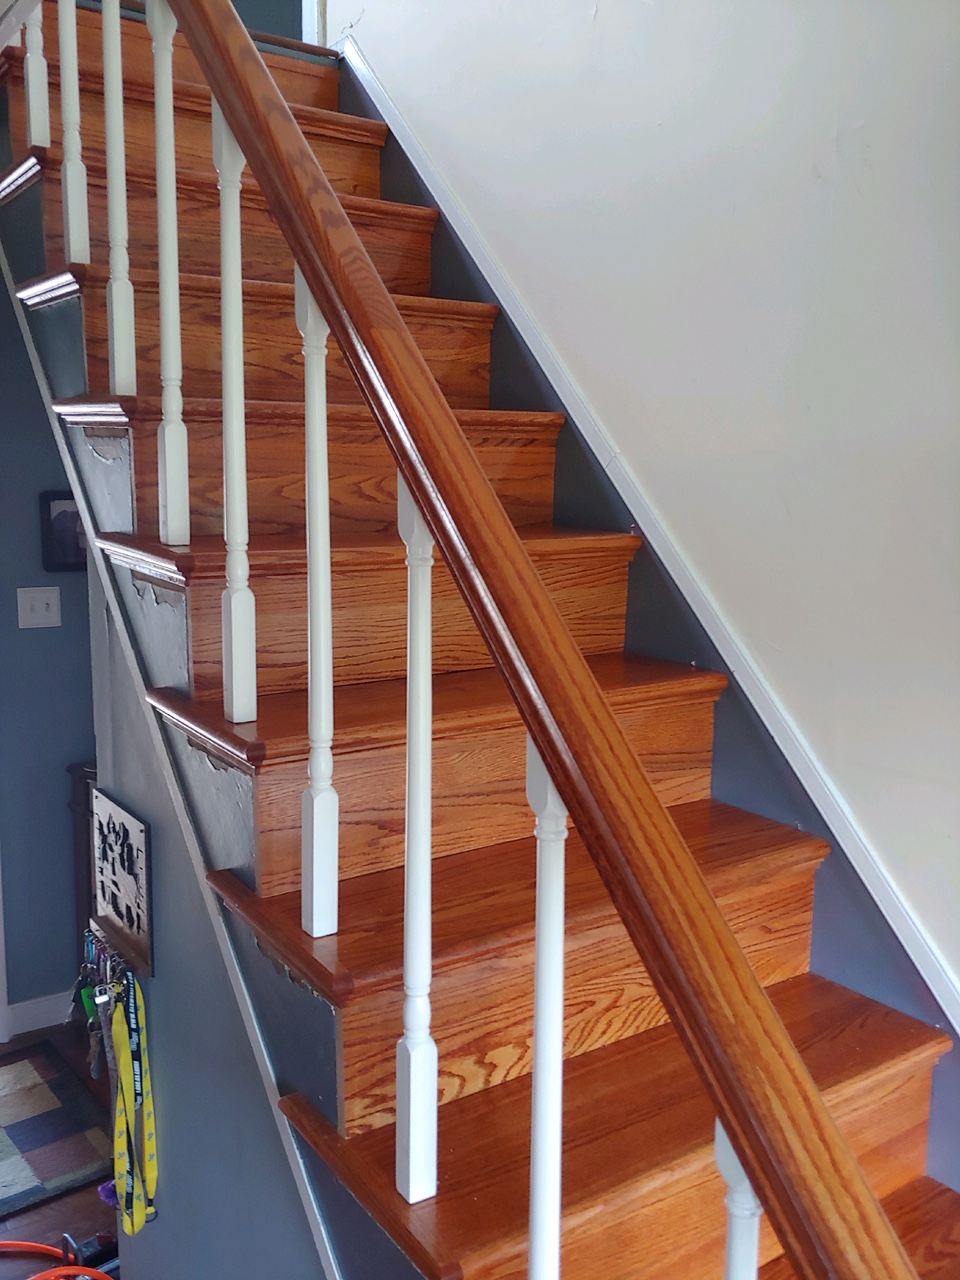
I recently helped a client retread their stairs in a farm house that was built in the 1890’s. The stairs going up to the second floor were original to the house. As you will see in the pictures that follow, what a difference the retreads made in the appearance of that room! Retreads are designed to fit over top of existing steps and risers so that when you are finished, you have what looks like a brand new stair case. If this is something that you need done at your place and you are of the DIY mindset then you might want to consider tackling the job yourself. With a few basic tools and some tips and instruction you can take that drab beat up set of stairs and make them look like something out of Better Homes and Garden.
1.) Count your steps and risers
Whatever number of steps you have you will need on more riser…i.e. 12 steps, 13 risers. Count your balusters and measure your handrail. Also make sure you measure both the width and length of the existing steps and risers. You will need to make sure that whatever retread you buy, that it is wide enough and long enough to cover the existing wood on your stairs.
2.) Pick out your retreads
There are several options available for the retread process. The big box stores like Lowe’s and Home Depot both sell retread steps and risers. Typically, these are unfinished. Staining and finishing these retread takes time but is not really difficult and can save you quite a bit of money if you are able to do this step yourself. However, if you look around can find prefinished steps and risers at some flooring stores and those that don’t stock it will order it for you. But once again, you will need to weigh the pros and cons and be prepared to spend about three times as much for the finished product as you would for the unfinished. The stairs featured in the pictures required a new handrail, newel post and balusters. You may not need those depending on the style of your stairs. If you do though, make sure you are getting matching kinds of wood…i.e red oak steps, red oak risers, red oak newel post etc.
3.) Installing your retreads
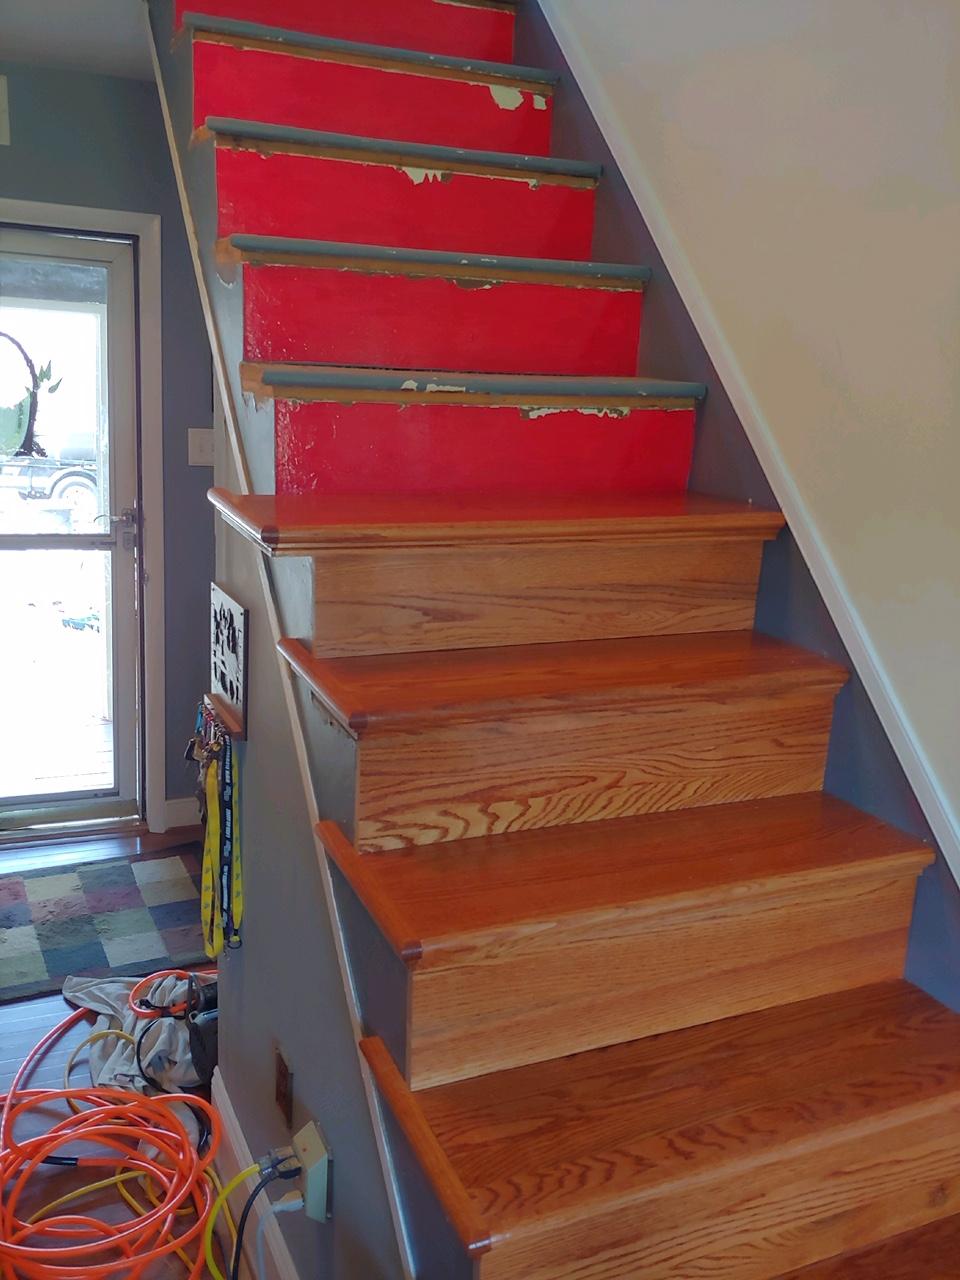
Once you have your materials ready to install, you may have to do a little demo work first…like removing the old trim on the exposed edge of the steps (see picture). If you are replacing the handrail and balusters go ahead and take them down as well. Start at the bottom by cutting the first riser to fit flush with the existing riser. (Tip: on older homes you can’t expect that the cut that butts up against the wall will always be square. Cut that to fit first and then cut the other end flush with the existing riser) When that is cut and fitted properly, tack it but don’t nail it yet. Next measure carefully the first step also checking the end that butts up against the wall. Once again, you may find that your wall is not square and therefore you will need to measure each side of the step for length and cut it to fit the wall. (Tip: always cut the first board a little long. You can always trim a little off later if necessary…. but you can’t put it back once it is cut.) Once you have both step and riser cut correctly and the fit looks good, go ahead and nail it down. (Tip: Nail your riser securely first placing nails under the overlapping trim of the step when possible. Nail the
back of the step securely so that when the next riser is placed it will cover the nails. An air powered finish nailer works well for this job since it leaves no nail marks and leaves minimal divots to fill later.) Next continue installing the rest of the steps and risers working your way up the stair case. (see picture)
4.) Install your Newel posts
Once all of your steps and risers are in place, set your newel posts in the correct locations making sure that they are set so that you have equal distance from your handrail (once it is installed) to your step throughout the whole length of your handrail. This step may take a little time and planning, but is essential for getting your balusters to come out the same length. Once you have solved that, secure your newel post with screws. ( Tip: Newel posts need to be well secured. Consider using longer screws and countersink and predrill your holes. With a counter sunk hole, you can install a wood plug cap to hide unsightly screws.)
5.) Install Handrail
Before you cut your handrail, it is a good idea to find a piece of scrap lumber that is as long as your needed handrail, and practice your cuts on it first. If your cuts look good you are ready to cut your handrail. Your handrail once cut will also need to be secured with screws. Countersink and predrill your holes for best results.
6.) Install balusters
Once you have determined the pattern for your balusters, set the base level it up to the rail and mark your angle for your cut. Re-set the base after the cut, check level and if it looks good secure to both step and handrail. If you have a peg and hole style for the base of the baluster, then use wood glue to attach. The top of the baluster can be finished nailed into position, the nail set and then the hole filled. When completed the retread stairs should look something like the project pictured.
On a difficulty scale of 1 to 10, I would rate this project as a solid 5. Most of this project is pretty straightforward and can be completed easily. Placing the newel posts, handrails and risers can be a little tricky and I would caution the DIY-er to budget a little extra time for that step. However, that being said, I would encourage anyone that is thinking about new stairs to consider the retread option. The results are always very pleasing at the very least….and downright stunning when done properly with the best materials. Good luck!
The links to external sites in this post are affiliate links, and we will be compensated when you make a purchase by clicking through our links.


