 Most drywall repairs involve either a hole that has been knocked in the wall or cracks in seams. This post will deal with how to neatly patch the “hole”.
1.) How big is the hole?
If the hole is less than 6 inches in diameter there are a couple of ways to make neat repairs. Let’s start with nail holes. Most nail and screw holes are a result of hanging something on the wall. They are rarely larger than pencil lead and even if they are as big as a no.2 pencil they are usually easy to repair. Buy a tube of spackling, or nail filler. It is usually located in your paint and caulking section at your local DIY store. There are many kinds and all that I have ever used seem to work fine. Just fill the hole using a putty knife, when it dries… sand lightly with 220 grit sandpaper and you are done. It is ready to paint. Bigger holes, the size of a pencil may take a second application of filler.
2.) Holes bigger than a pencil
For bigger holes the size of a door knob, a fist or even a grapefruit…I recommend a patch kit. These are also sold in the paint and caulking section of your DIY stores. A patch kit is a fiberglass mesh, reinforced with an aluminum mesh with adhesive( TO STICK TO THE WALL)on one side. You peal off the paper over the adhesive and stick it on the wall being careful to completely cover the hole.
Important note: Make sure that the patch is completely FLAT before you install it. If it is bent , has an upturned edge, a lump in the middle etc. ….do not use it. Take it out of the box and inspect it carefully….lay it on a flat surface and make sure it is flat.
Once it is in place you can begin the drywall repair using drywall compound.
3.) How to finish drywall using drywall compound
Finishing drywall neatly is mostly a matter of patience. It takes time for drywall compound to dry. Drywall compound shrinks when it dries. That means when you fill a hole….when the compound dries you often will still have a low spot at the repair site. Therefore, you have to fill it again…and let it dry again. Resign yourself to the fact that it may take 3-4 coats of applying drywall compound to get the patch even with existing walls. It takes time to finish drywall properly.
Tip: To save time, if you layer your drywall compound on thickly to start with, to the point it is sticking up well past the surface height of the patch site, then when it dries and shrinks slightly it may still be higher than the patch level. In that case, you can sand it down level with the surrounding area and you can be ready to paint.
Now that being said, there are some tools if used and techniques that if followed they will greatly improve the outcome. Let’s start with the tools.
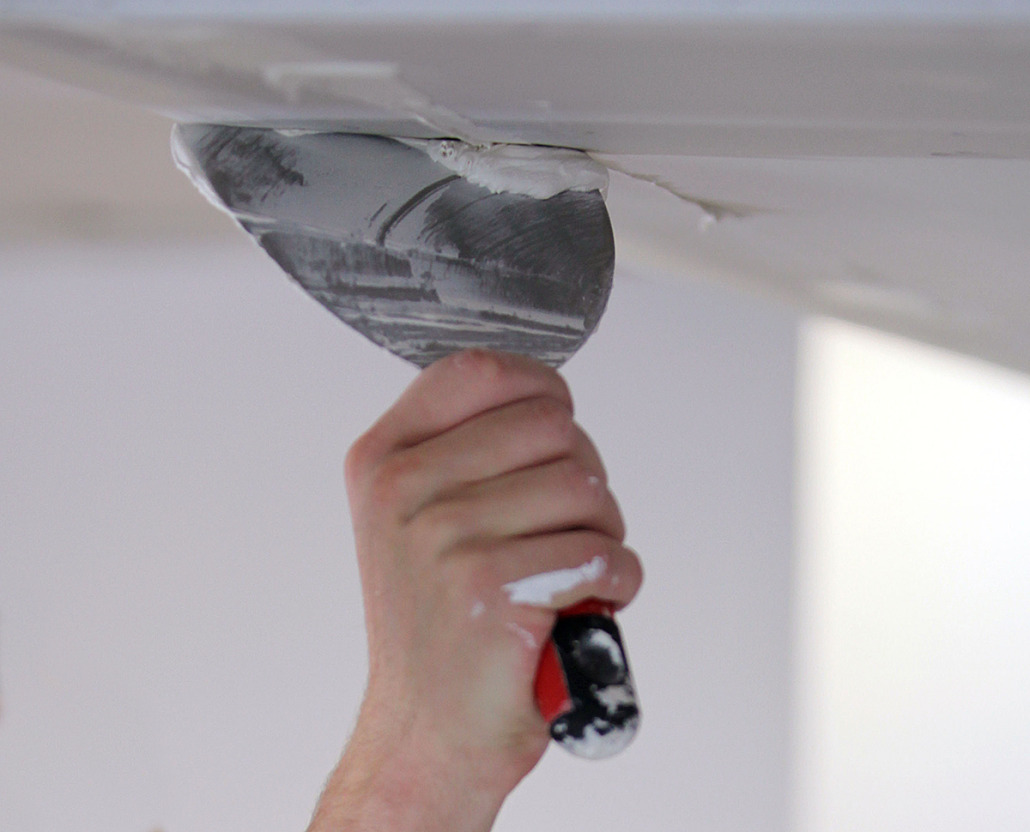
You will need a drywall knife. Why they are called knives I don’t know…other than it may look to some like a giant putty knife. It is the flat blade with a handle the you use to apply the drywall compound to the walls, patch site, or seams. I use a stainless steel one with a 6″ blade for most repairs. I also have a 12″ one for really extensive repairs. Some drywall compound containers come with a plastic 4 inch knife drywall knife. For most do-it-yourselfers that will probably work fine.
You need a drywall sander. To achieve a flat surface on a repair you really need a sander that will span the patch site. That way you can use the wall surrounding the patch as a gauge as to what height the patch must be to be level. Get a Loop and Hook drywall sander. It looks in general shape like a concrete finisher’s tool but made out of plastic and has Velcro on the flat bottom surface. It is about 12″ long and 4″ wide with a handle. Get some 120 grit sandpaper for it and stick it on the bottom. This is a very good tool for sanding drywall.
Of course you will need the drywall compound. Drywall compound can be purchased in quart and even pint sized containers for the small patches. It is not pricey and it is wise to buy a little more than you will think you need. They also sell drywall compound that is low dust. When you start sanding the dried compound, it creates a cloud of fine dust. It is not toxic, but is annoying to clean up. I usually buy the low dust compound.
Once you are ready to start filling your hole, simply use your drywall knife to apply a thick coat of compound over the site. Keep in mind that the thicker your layer of compound, the longer it takes to dry. I try not to apply compound thicker than 1/4 inch. You can tell your compound is dry when it turns from the pale gray it is when you apply it to nearly white when it is dry. Make sure it is completely dry before attempting to sand. Sanding drywall compound that still has wet spots in it gums up your sandpaper and creates more work.
4.) Sanding your patch site:
Tip: As you sand the dry compound, make sure you try to keep your sanding tool laying across the repair site so that its outer edges are touching the surrounding flat surface. If you do this as you sand, you will sand down the patch site level with the surrounding walls.
Once the patch site is well sanded and seems level with the surrounding walls,
IMPORTANT: get a portable light source ( a flashlight, or shop light will do) and hold it to one side of the patch site and inspect the work carefully. If there are any imperfections, the light will cast shadows on high or low spots.
If you have high spots, keep sanding. If you have low spots, add a thin layer of compound and let it dry. Then repeat the sanding process and the inspection process. Once you have the site level and smooth you are ready to paint. Drywall compound is porous and will take a lot of paint the first coat so be prepared to paint the patch site twice.
I hope this helps you with your home repair project. Of all the DIY projects that the homeowner can do, this one is probably the most doable and on a difficulty scale of 1 to 10 I wouldn’t rank it higher than a 2 at most. Drywall finishing is very forgiving. If you put too much on, sand some more….if you don’t have enough on the site….just add some more. I think the biggest mistake most newbies make is not putting a light source next to the patch and therefore can’t see the high or low spots until after they paint. If you follow the tips outlined in this post, then this project is a snap! Got a question? Post it in the comments section below so others can learn too or send me your question via our Ask James feature! Good luck!
The links to external sites in this post are affiliate links, and we will be compensated when you make a purchase by clicking through our links.