Reorganize Storage in 5 Easy Steps
Bring the fresh and new feeling of spring inside by cleaning those cluttered closets and cabinets. Marie Kondo’s first best selling book The Life-Changing Magic of Tidying Up: The Japanese Art of Decluttering and Organizing and it’s follow up best seller: Spark Joy: An Illustrated Master Class on the Art of Organizing and Tidying Up (The Life Changing Magic of Tidying Up) are all the rage in the world of organization right now. But if you need a quicker read, DCI has a 5 step process to help you stop procrastinating now and get those spaces clean today! Click the image below to get started!

Follow the links below to quickly get resources for your storage and save money today!
Home Depot
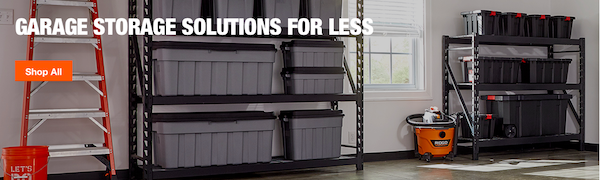
Offer: Garage Storage Starting at $49.98 through August 25, 2019
Offer: Garage Cabinets Starting at $109.98 through August 25, 2019
Offer: Husky Garage Cabinet Sets Starting at $503.19 through Ausgust 25, 2019
Amazon
Evelots Closet Wood Shelf Divider-New & Improved-Separator-Easy Clip-Steel-Set/8
YouCopia 50100 StoraLid Food Container Lid Organizer Large White
Lynk Professional Organizer with Pull Out Under Cabinet Sliding Shelf 11″ W x 21″ D Chrome
The links to external sites in this post are affiliate links, and we will be compensated when you make a purchase by clicking through our links.
Privacy Fencing
In the world of smaller building lots and houses that are being built closer together, there are times when a little more privacy would be much appreciated. Vinyl privacy fences that are sturdy and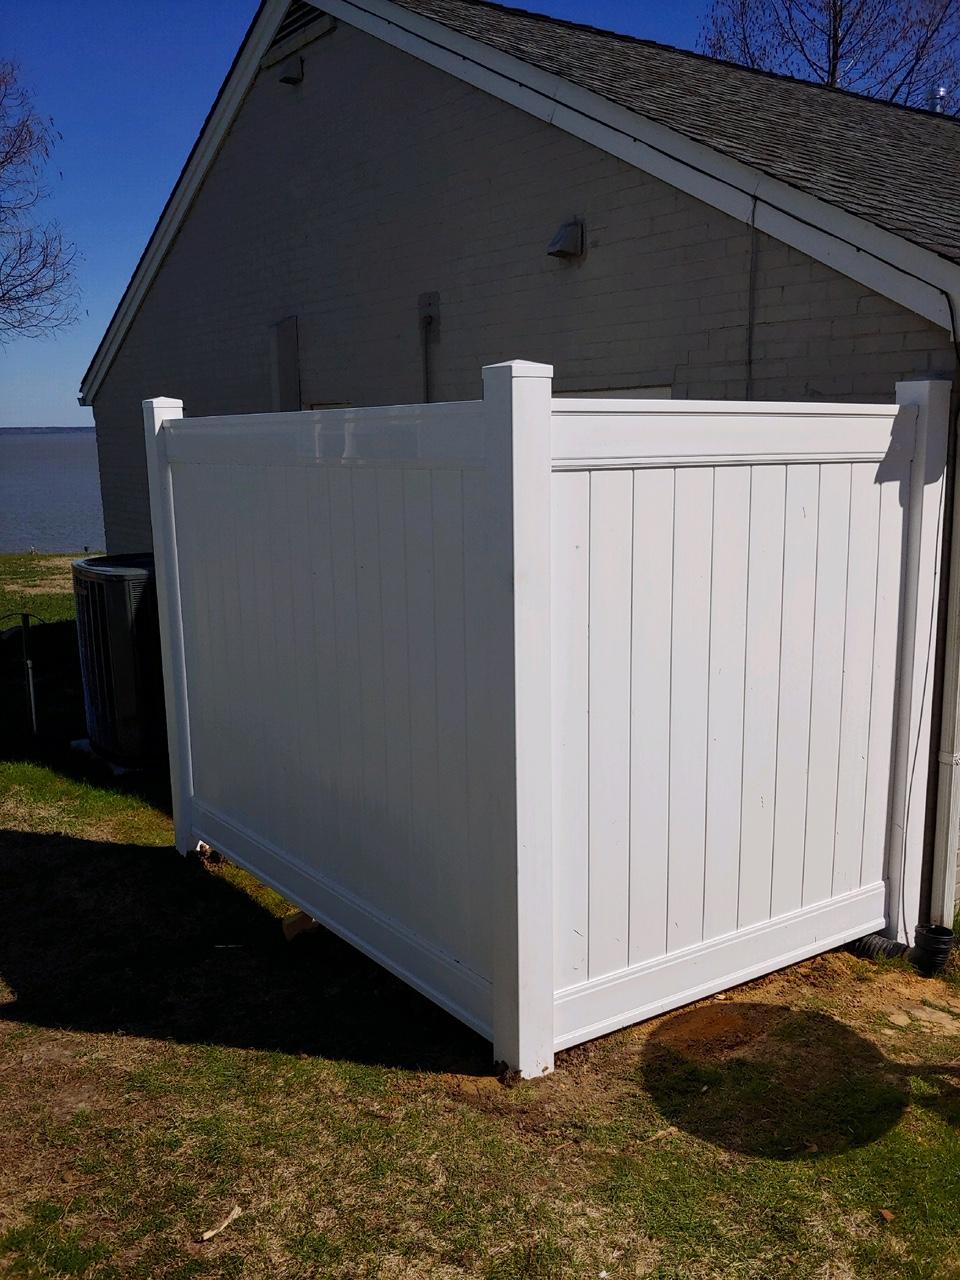
relatively maintenance free can be put up within a weekend. This easy improvement adds visual appeal, value to your home and the privacy you need. As I describe the process of putting up a privacy fence look for the tips and techniques that will help you make this an easier improvement for your home.
This week I built a privacy fence not so much for the resident’s need for privacy, but to screen propane tanks from the view of road traffic. The homeowner simply wanted to enhance the visual appeal of the home from the road. In this case, the project was to build two sections in the shape of an “L” on the front side of the house. A fence obviously would involve more sections and also a gate, but the basics and techniques of the install are the same. Let’s start with materials.
1.) The project: In this case the homeowner requested a vinyl privacy fence. There are several options available at most box stores. I chose a 6’Hx 8’L vinyl panel kit. The kit includes the wall panel but the posts must be bought separately. I chose the kit for two reasons. The first reason was that it would be easier to customize for width. I will talk more about that later. The second reason I chose a kit was for ease in transport. The kit came in a box (an 8-foot-long box granted) but a box that was more manageable than a 6×8 fence panel. Most of us would have trouble transporting something of that size. The next thing you will need is the end posts. These are what the panels are secured to. They are 5”x5” vinyl post sleeves. Choose carefully, since there are three types: One for the end, one for inline and one for corners. You will need 4×4 pressure treated posts and fast setting concrete.
Material list:
- Vinyl panel kit
- Vinyl post sleeves
- 4×4 pressure posts
- Fast setting concrete (50lb bag)
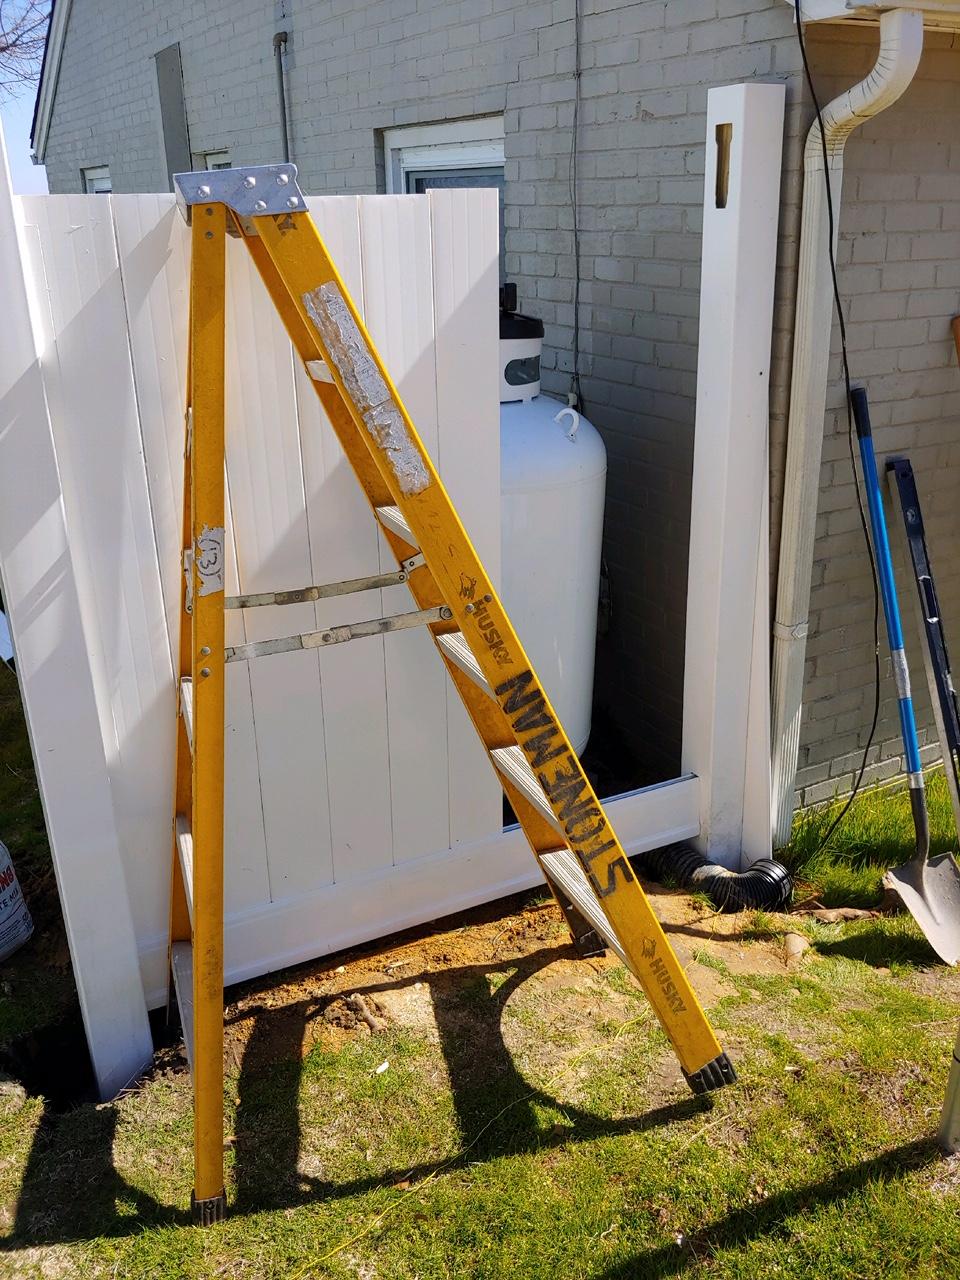
2.) Tools you will need:
- Post hole digger (or shovel)
- Level
- String
- Tape measure
3.) The process: Prep work is a part of any job and to make a fence that is square and level takes a little extra time, but it is necessary if you want a quality job. Before I start digging holes, I stretch strings. One string along the front of the existing dwelling and past it along the line of where I want the fence. Also, a separate one at a 90-degree angle intersecting this one. I take measurements from the existing dwelling to make sure I’m maintaining the same distance all the way down the string.
4.) The holes: The holes for the fence posts need to be about 10“ in diameter (a little bigger than a large dinner plate). This allows for the concrete and also for adjustments (there is nearly always a need for adjustment on way or another) Tip: put your excess dirt on a tarp to keep your grass clean. The holes need to be at least 18” deep…deeper where the frost line is deeper. The more northern your climate, the deeper you need to dig.
5.) Setting your posts: Set the first post and then slide the vinyl post sleeve over it. Next level it and put your concrete in. If necessary, use stakes and props to secure it in place. Once it is secure (fast setting concrete will make this quicker), you can place your second post in its hole and start assembling your fence panel per the instructions. Do not put your concrete in yet. If you have to fit a section of wall in a smaller that “stock” width, then a kit that must be assembled makes the job much easier and neater. You just need to cut the top and bottom horizontal pieces and then just add the correct number of pickets to fill in the width. A little math will be required to get it all correct so make sure you take the time to figure it carefully (I made the calculations twice and checked my measurement several times). I needed to make my first section of fence a total of 72 inches from brick wall to edge of lot line. When you subtract the width of the two posts (4 ½” each) and allow for the 1” each for the top and bottom piece to protrude into the post sleeve and ½” for “play” my total overall length of my first panel was 62 ½”. Once your panel is assembled, then level your post and secure it with concrete per instructions (once again you may have to temporarily secure it with stakes and props).
6.) Keeping it straight and level: With your string you should have no problem keeping your fence going straight. Level is easy if your lot is relatively flat. If it slopes though, you have to take other measures. On is to gradually drop the end of each succeeding panel. If you do this, you will need to stretch a string from corner to corner at the of the panel and use that string as a guide. If your lot drops too much for this to work. You may need to drop each succeeding panel a few inches on both sides to create a stairstep effect.
The great thing about a vinyl fence other than the ease in which it can be installed, is that once it is up it is nearly maintenance free.
The links to external sites in this post are affiliate links, and we will be compensated when you make a purchase by clicking through our links.
Planning a Home for Now and the Future
Retirement does not mean the same thing to everyone. Chesterfield couple, Ernie and Lou O’Boyle, recently decided to move from their 1500 square foot condo to their 2600 square foot newly constructed home. The O’Boyle’s are at the time in life when people begin thinking about where they want to live through retirement but for them it didn’t necessarily mean downsizing or slowing down. They love to travel, entertain, and host family and friends for extended stays. But they know that one day they will opt for a slower pace. So, they needed a home that would accommodate their needs now and later.
  DCI recently asked Lou and Ernie about what they considered when making decisions about their new home. While the O’Boyle’s opted to build, many of the features they chose could be implemented into an existing home.
What did you consider when selecting features for a home that will likely be your home through retirement?
“We started by sitting down and talking through what we wanted life to be like for us. We then identified features in a home that would support the life we wanted.” (Lou and Ernie’s wish list and the choices they made to make those wishes become reality in their home is below. DCI added how an existing home could be modified to include these features as well.)
Wish: We wanted to be independent as long as possible.
Choice: First level living
Existing home modification: Is there a room that could be converted into a bedroom? An office, sunroom or even a dining room – with the addition of a closet – could work really well.
Wish: We have a lot of friends and family that come to visit.
Choice: Comfortable separate space for our guests upstairs
Existing home modification – Convert master bedroom to guest room upstairs and convert a room downstairs to a bedroom or add a master onto the first level.
Wish: We wanted to be able to close the door and go.
Choice: A maintenance free community
Existing home modification – Establish an ongoing contract with a local yard and home maintenance businesses.
Wish: We wanted a real sense of community.
Choice – A neighborhood that had the amenities to support community relationships (clubhouse, pool, walking trails, etc.)
Existing home modification – There really isn’t a modification here if your current neighborhood does not have these amenities.
What do you love about your home and think it will serve you well as you age and why?
- The infinity shower – The infinity shower is stylish and yet would accommodate a wheelchair without any adaptation.
- Pantry – The large walk in pantry puts everything within reach and supports my love of cooking.
- Universal construction that provides wide hallways and doorways
What advice would you give others who may be thinking of building a new home or remodeling their current home to serve them through retirement?
“Begin by envisioning what you want life to be like and make the building / remodeling choices around that versus beginning with what you want the house to be like.”
If you or a family member is at the point of improving an existing home or building a new home for the future, contact us at DCI! We’ll help you DIY or we’ll do it for you!
The links to external sites in this post are affiliate links, and we will be compensated when you make a purchase by clicking through our links.
Market Ready or Not!
 Spring is the busy season for putting homes on the market. Leading RVA realtor Annemarie Hensley of Liz Moore and Associates, graciously answered a few questions DCI asked on getting your home market ready. DCI has partnered with Annemarie on the purchase of one home and the selling of two others. We’d partner with her again in a quick second. She knows her real estate! If you are considering selling your home, this post is for you! Even if you are not, this information is great for keeping your home market ready when you are!
What repairs/updates would you consider to be the least effective (i.e. will not bring a great ROI) when putting a house on the market?
When thinking about updating a home, it is important that home owners are selecting neutral materials and designs. For instance, repainting can be a great and fairly inexpensive way to update your home, but if you select the wrong colors, it could be a turn off for buyers and cost you a sale. And wallpaper is NO, as it is much too personal and tough to remove. Technology is great too, but electronics can be quickly become outdated, so adding home theaters and other electronics are expensive and will not add much in terms of ROI. Neither heavy landscaping nor pools will yield much in ROI either, and I would suggest staying away from both if you plan to sell in the near future.
What repairs/updates would you consider to be the most important when putting a house on the market?
When a home hits the market, it needs to shine like a new penny! Improve your curb appeal by power washing surfaces, have a freshly painted front door, and new mulch. Buyers focus on kitchen and baths on the interior. So, if yours are still Avocado Green and Harvest Gold, you may need a complete remodel, and remember to use colors and materials that will appeal to a broad range of buyers.
What are the hottest trends right now to help a home sell quickly at maximum price? (floor plan, wall color, countertops, flooring, appliances, etc.)
Buyers are searching for open floor plans! Having the kitchen open to the family room is especially appealing. Most homes these days are showcasing some sort of stone counter top. Simple subway tiles for back splash add great appeal. Neutral wall colors are great and currently, grey tones are especially popular. My favorites are Rever Pewter, Agreeable Grey and Grey Owl. Flooring can depend on your market, but hardwood floors are popular and wide plank or varied width floors seem to top the list now.
What would steps would you recommend for home owners who do not want to sell their home presently, but would like to keep it “market ready”?
Having your home market ready, means having the house uncluttered, depersonalized and tidy! Have fresh paint, updated lighting and updated plumbing fixtures. Again, chose neutral colors! Make sure all mechanical systems and appliances are in good working order. I would even recommend servicing your HVAC system on a regular basis.
Replacing a Water Heater
On the DYI scale, I would put replacing a water heater somewhere near the upper portion of difficulty skill level. You will need a few specialized tools and knowledge of how to make good, safe plumbing, electrical and/or gas connections. If you are unsure if you can do this yourself then be sure to leave it to a professional. If, however, you have enough experience to feel you can do this yourself, then I will offer some tips to make the job go a little easier.
1.) Pick out a replacement: I recommend finding a replacement as similar as possible to the one you have in physical size, capacity and style. For instance, if you upgrade to a larger capacity, will you have the actual physical space to get it in same location? By sticking to what you had before, and what worked before, you can avoid potential unforeseen difficulties.
2.) Shut of power/ turn off the gas: Before you work on anything electrical, always turn off the power. Water heaters will have a separate breaker in the electrical panel and are usually easy to identify. When you have turned the breaker off to the water heater, check to make sure power is off with a pocket tester. Now that power is off you can begin to drain the tank.
3.) Turn off water valves: Most water heaters have inline valves near the tank to turn the cold water off going in and to turn the hot water off going out. Turn these both off.
4.) Drain the tank: Water heaters have a drain valve near the bottom of the tank and you will need to attach a garden hose to it and run it outside. Turn on the drain valve and lift the pop-off valve up on top of the tank to allow air into the tank. Water should begin to flow out of the hose. If it does not you may need to briefly re-open the cold water valve to pressurized the tank. This will usually cause the water to start flowing through the hose. Immediately turn the cold water valve back off. Once the tank is drained, you can begin the removal process.
5.) Disconnecting the water lines: There are several kinds of water lines and each has it needs as far as taking apart and replacing. If you have copper lines, then you will need to cut those lines about 6 inches above the existing water heater. I recommend using a small tubing cutter. It works in tight places and makes a clean straight cut, which will help when you are putting things back together later on. CPVC water lines will need to be cut as well. To avoid cracking or breaking them and to also have a clean cut, I will often use a tubing cutter on them as well. It takes a little longer but is worth the effort.
6.) Remove electrical/ gas connections: Since you have double checked that your electricity is off, go ahead and take your electrical connections loose. A helpful tip is to take a picture of your connections before you disassemble. If you have a gas water heater, make sure your gas valve that is near your water heater is turned off. Also a good idea is to take a picture before you disassemble. Go ahead and loosen your gas line connectors. You may smell a little gas but that is normal. In the case of the gas water heater, you will also need to remove the exhaust pipe from the chimney on top of the water heater. Once everything is loose and since the water is drained from the tank, you can move the tank.
7.) Installing the new tank: With the old tank out of the way, simply put the new one in its place being careful not to damage the water heater pan. If you have someone that can help you lift it and put it in the pan that would be best. I have found that the easiest way to re-connect the plumbing lines is to use “shark bites”. These slip on fittings if installed properly make for fast dependable connections. No need for sweating on copper fittings or gluing of CPVC couplings. Most new water heaters will require that you install new female adaptors into the top of the heater for the Hot and Cold water lines. I usually get a female adaptor to CPVC with galvanized threads and install using plumber’s pipe thread compound. Then I glue a short piece of CPVC to bring me close to the copper or CPVC. Then finish off the connection with the “shark bite” connector.
8.) Finishing the Install: After the water lines are reconnected, install the pop-off valve overflow pipe running it either to an outside drain or into the water heater drain pan. If you run into the drain pan, make sure you leave a little room for the pipe and run the pipe about an inch from the bottom of the pan to allow the flow of water to be unrestricted. Re-wire the electrical connections or if a gas heater re-attach the gas lines making sure you use the proper pipe thread compound. If it is not rated for gas, then make sure you get some that is.
9.) Final checks: After everything is hooked back up. Turn the water valves back on and go turn on the hot water at a nearby sink to allow for air to escape as the tank fills. While the tank is filling and after it is filled, inspect the water line connections carefully for any leaks. If electric, turn on the power and listen to see if you can hear the elements humming to indicate the heater is working. If gas, turn the gas valve on and light the pilot. Smell for gas leaks. Also take a few moments and spray soapy water on all of the gas line connections you made. If you use the correct thread compound, you shouldn’t have any gas leaks…but if there is a leak the soapy water will allow bubbles to form to let you know that there is more work to be done.
Once everything is hooked back up correctly and the water is heating, you can soon get back to enjoying those hot showers again!
The links to external sites in this post are affiliate links, and we will be compensated when you make a purchase by clicking through our links.
Water Heaters: The All Season Necessity
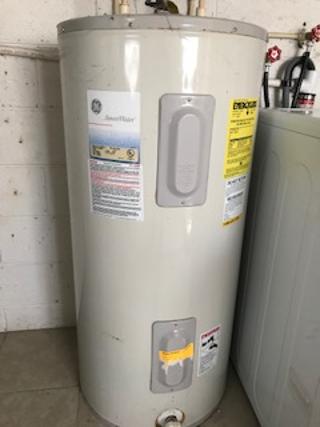
Water heaters are wonderfully convenient and economical devices. They provide that delightfully hot water for showers on a cold day, and germ-killing heat to clean dishes to help keep us healthy…and do it with minimal effort and expense on our part. They are the all-season necessity of the home. Water heaters whether gas or electric have a working life span of somewhere between 7-20 years. Eventually, the elements burn out or sediment builds up inside, or the corrosive nature of water on metal eats a hole in them somewhere. At some point you will have to replace them. How do you know when it is time to replace it though?
When to replace a water heater: Most of us pay little if any attention to our water heater until either it stops heating water or until a family member hollers out that there is water all over the floor, ceiling etc. At either of those two instances there is obviously a problem. Generally speaking this is how most of us know it is time to swap out that water heater. It is either not heating or it is leaking. To be frank, there is not a lot you can do to know ahead of time when a water heater is on its last leg. But what you can do is to drain and flush the tank once a year as recommended. This is a good time to look closely at your water heater. Do you see any tell-tale rusty spots? Your water heater should not have rust on it anywhere. If it does, then you probably have a leak. Catching and fixing leaks in the plumbing lines early can save you a bundle on a new water heater and replacement bills by extending the life of your appliance. If however, the leak is in the tank itself, then it is best to address it immediately and get that tank replaced.
The second part of this post will focus on the steps required to replace a water heater and guidance on whether to DIY or leave it to the professionals. In the meantime, contact us at DCI if you have any questions about your water heater.
Getting Ready for Spring!
Spring is just around the corner and now is the perfect time to start planning for the outdoor extension of your home! Tom Thompson owner of Natural Art Landscaping and trusted partner of DCI offers his advice to homeowners on how to plan for springtime and enhance your outdoor living space. Read on as Tom answers a few of our questions!

What maintenance and new planting is best in the spring?
If you didn’t cut your perennials back in the fall, cut them back now. Mulch is best applied in the fall, but you can do it now too. It is still too early for planting annuals. Generally, you should wait until the last frost. I just wait until my local garden center starts selling them; they won’t offer them if they’re not pretty sure they won’t get killed by frost. You can plant trees and shrubs any time. Just remember that they’ll need supplemental water during the hot months. If you want to plant grass seed, you’re wasting your time. It will never develop enough root to live through summer. You can lay sod if you want, just not seed. Prune trees for shape and safety while you can still see the limb structure. Prune evergreen shrubs for size and shape (leave your azaleas alone until after they have bloomed!) and deciduous shrubs pretty much whenever you need to.
How should a homeowner prioritize spring maintenance?

- Prune now – you’re almost too late for Crapemyrtle and you’re getting close for English boxwood (English box only produces one flush of new growth a year so you need to prune it before that growth starts).
- Clean up any dead leaf litter after pruning and before mulching – gets rid of any pathogens or beasties that might want to attack your plants. Hopefully you put down an organic fertilizer (think Espoma!) in the fall but you can do that now. Mulch. Wait. Enjoy!
- Don’t fertilize your lawn. That should have been done last fall along with aerating and over seeding. If you feel the need to pull the spreader out, then get a soil test and spread some lime.
When should I scrap a plant and start over?

Is the plant performing? Do you like it? Did it out grow its space? Is it healthy? Does it have any sentimental value? If a plant is planted in the wrong spot, it’s a weed, no matter what it is. The question then is, if you like it, is it too big to move, and even if it can be moved, is that practical, based on how much transplanting it will cost? Best advice is to call someone to take a look at it to see if it’s worth saving. In my experience, I’ll recommend trying to transplant a healthy plant to a better location only if there is a reasonable chance of its surviving the shock of being moved. Removal and replacement with a new plant is a whole lot cheaper than paying labor to transplant something that ends up dying. If the plant has sentimental value, that changes everything. If Grandma’s lilac is in the way of the new wing of the house that you’re having built, then you have to try and save it – if you liked Grandma. ALWAYS take cuttings when attempting this. Better to have some rooted cuttings alive and ready to be planted, just in case the lilac dies! That is one doghouse in which I do not want to reside!
What if I don’t have room for landscaping/gardening?

People who live in apartments, townhouses, retirement communities or condos can still have fantastic gardens even though space is limited. There are many varieties of dwarf trees and shrubs that can be planted and live for years in decorative containers made from a lot of different materials. Terra cotta, glazed porcelain, galvanized stock tanks, old file cabinets, even old blue jeans – all make interesting planters. No space to spread out? Go up, vertical planting is high fashion these days. Use the walls that surround the small garden to good effect – hang planters, built a lattice of cable or wood and grow climbing vines, hang artwork, mirrors, old windows, paint a mural (VCU has one of the best art schools in the country just filled with young, inexpensive artists in need of a canvas). Get some comfortable furniture, throw down a rug, fill a fountain with water and turn on the pump for background noise, add some interesting lighting and you have quite the pleasant oasis. The smaller the space the more imagination you can use.

The links to external sites in this post are affiliate links, and we will be compensated when you make a purchase by clicking through our links.
Exterior Doors – Part 2

In Part 1 of this post, I discussed how to maintain exterior doors to avoid repair. You can read that here! Sometimes, despite our best efforts or a lack there of, we need to make repairs. In this post, I’ll break it down by repair size and replacement amount.
- Small repairs: If the damage is only just starting with minimal wood rot, then wood repair is a good option. With a sharp chisel carefully remove damaged wood until you see only clean solid wood. Purchase a two-part epoxy wood filler for best results. Using the wood filler, fill the depression and if possible, with first application, overfill so that the filler is higher than the surrounding surface. (If you still have a depression in the surface after it dries then you need to apply more wood epoxy). It will dry in less than 30 minutes at which point you can begin to shape and smooth with a putty knife. When it hardens too much for the shaping (and it won’t take long), then switch to 120 grit sandpaper and sand the surface flush with the original wood surface. When you have it ready, then paint to match.
- Larger repairs: Sometimes too much of the brickmold is damaged to repair. With the brickmold you can cut out the damaged part and splice a short piece of PVC brickmold in its place.
- Replace the door frame: Sometimes the door frame has rotted all the way through to the inside of the door. This is a bigger problem which requires a bigger solution. If you have the correct door frame side to match, then you can cut out and replace the damaged piece much like replacing the brickmold piece. If too much it rotten then you can also replace the whole side(leg) of the rotten door frame. That makes for the neatest looking job. It however, requires a higher skill set and more specialized tools and, in most cases, best left to the professional.
- Replace the whole door: Sometimes things are so far gone, that the best solution is to start over with a new door. If that is the case, then consider getting a new door with the composite frame. There is no wood in the frame nor the trim. It is all composite construction. There is now no worry of it rotting…ever. Typically, these doors are more expensive but may warrant the extra cost in saved time and maintenance over the long term.
When maintained properly, exterior doors help keep your house warm in the cool months, cool in the warm months and your energy bills in check. It can be a project that fits into the DIY category, but sometimes requires some a professional. Contact us at DCI if you need help!
The links to external sites in this post are affiliate links, and we will be compensated when you make a purchase by clicking through our links.